
TL;DR
Automating bathroom fans helps maintain ideal humidity levels, preventing mold and odors while saving energy. Use sensors, timers, or smart tech for reliable, hands-free control that adapts to your bathroom use.
Imagine stepping out of a steamy shower into a fresh, mold-free bathroom. Automated fans make that happen without you thinking about it. They turn on when needed, then quietly shut off, saving energy and protecting your home’s health. This guide unpacks how to set up these smart systems so you breathe easier and keep mold at bay.
If you’ve ever forgotten to turn off your bathroom fan or wondered if it’s working efficiently, this article is for you. You’ll learn simple steps to automate humidity control, the best sensors and timers, and how modern tech can transform your bathroom routine into a smart, energy-saving ritual.
Choose a humidity sensor with a quick response time and place it away from direct water spray for accurate readings.
Combining a humidity sensor with an adjustable timer offers the best balance of efficiency and comfort.
Smart home integration provides remote control, AI learning, and energy tracking—making humidity management effortless.
Proper wiring and sensor placement are critical; consider hiring a professional for complex setups.
Maintaining your system with regular calibration and cleaning ensures reliable operation and safety.
Why Automate Your Bathroom Fan? The Benefits You’ll Love
Automation isn’t just a fancy upgrade—it’s a practical move to keep your bathroom healthy. By controlling humidity automatically, you prevent mold, reduce odors, and improve air quality. Plus, you save energy by avoiding unnecessary fan runs, which cuts your utility bills.
For example, if your bathroom tends to stay humid after a quick shower, a smart system will detect the excess moisture and activate the fan. Once the humidity drops, it turns off. You get all the benefits without lifting a finger.

Leviton Humidity Sensor Switch for Bathroom Exhaust Fan, Automate Ventilation, Air Circulation, Moisture Control, ¼ HP, Single Pole, DHS05-1LW, White
- Automatic Fan Control: Turns bathroom fan on/off automatically
- Easy Installation: Slim profile fits most wallboxes
- Flexible Wiring: Install with or without neutral wire
As an affiliate, we earn on qualifying purchases.
As an affiliate, we earn on qualifying purchases.
How to Choose the Right System: Humidistat, Timer, or Smart?
Picking the perfect automation setup depends on your needs and home wiring. Here’s a quick comparison:
| System Type | Best For | Pros | Cons |
|---|---|---|---|
| Humidistat-Based | Precise humidity control | Maintains ideal levels, energy-efficient | Requires sensor installation |
| Timer-Based | Simple automation after use | Easy to install, affordable | Less precise, may run longer than needed |
| Smart Home Integration | Remote control & automation | Convenient, customizable, voice control | Higher cost, some wiring complexity |
When selecting your system, consider the tradeoffs: a humidistat provides precise control but may require more complex wiring and calibration. Timer-based systems are simpler and more affordable but can lead to over- or under-ventilation if not set correctly. Smart integrations offer unmatched convenience and adaptability—ideal if you want a future-proof setup—but come with higher upfront costs and potential installation challenges. Balancing these factors ensures you get a system that fits your budget, technical comfort, and performance expectations. For example, pairing a humidity sensor with a timer can give you both precision and simplicity, helping you prevent mold while avoiding unnecessary energy use.

ENERLITES Countdown Timer Switch for Bathroom Fans and Lights, 1-30 Min, Neutral Wire Required, UL Listed, White
- Automatic OFF for Fans and Lights: Turns off ventilation, ceiling fans, and lights
- Multiple Timer Settings: Sets countdown from 1 to 30 minutes
- Easy Wall Switch Replacement: Replaces standard switches for convenience
As an affiliate, we earn on qualifying purchases.
As an affiliate, we earn on qualifying purchases.
Step-by-Step: Setting Up a Humidity-Triggered Fan System
Here’s how to get your system up and running in five simple steps:
- Choose a reliable humidity sensor and compatible fan. The sensor’s responsiveness directly impacts how quickly your system reacts to changing conditions, affecting comfort and mold prevention. A slow sensor might delay activation, allowing excess moisture to linger and increase mold risk, while an overly sensitive sensor could cause unnecessary fan runs, wasting energy.
- Decide on a mounting spot—preferably away from direct water spray but in the airflow zone. Proper placement ensures accurate readings, which are critical because false readings can cause the fan to run unnecessarily or not enough, leading to energy waste or mold risk. For instance, placing the sensor too close to the shower spray can cause it to detect high humidity constantly, triggering the fan unnecessarily, while a poorly placed sensor in a drafty corner might miss real moisture buildup.
- Turn off power at the circuit breaker. Safety first! Ensuring power is off prevents electrical accidents during installation or wiring adjustments. Skipping this step can result in electrical shock or damage to your system.
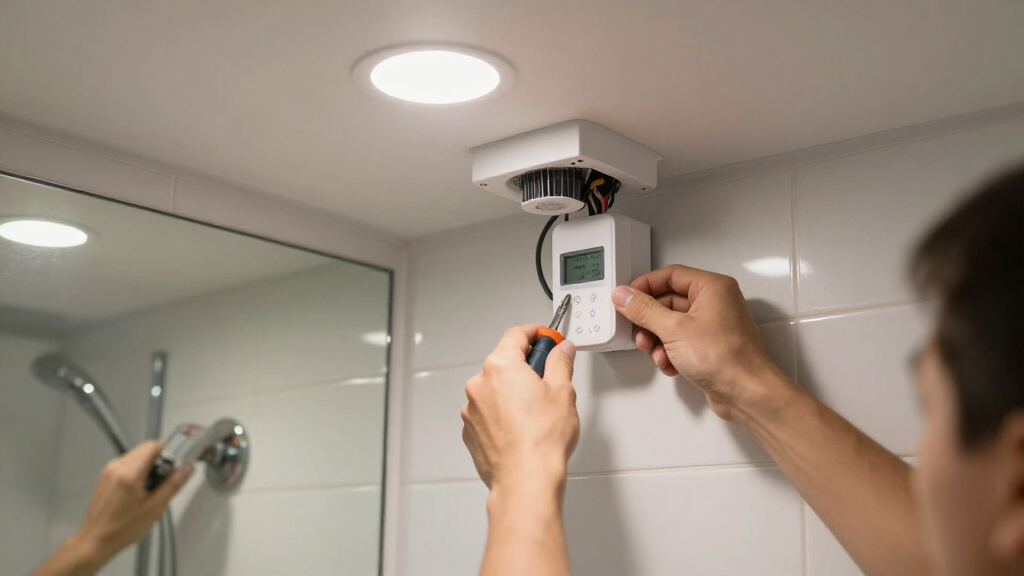
- Wire the sensor to your fan according to manufacturer instructions or hire a licensed electrician for complex setups. Correct wiring guarantees system reliability and safety, and professional installation can prevent future failures or safety hazards. Improper wiring can cause system malfunctions, which might lead to increased energy use or even electrical fires.
- Set your desired humidity threshold (typically around 45-50%) and test the system during a shower to ensure it activates and shuts off correctly. Fine-tuning the threshold balances effective moisture removal with energy efficiency, which is crucial for long-term operation and mold prevention. For example, setting the threshold too low could cause the fan to run constantly, wasting energy, while too high might allow mold to develop before the fan triggers. Regular testing and adjustment help maintain optimal performance and longevity of your system.
For example, installing a sensor 3 feet above the toilet seat, away from the shower spray, ensures accurate readings. Adjust your threshold until you find the sweet spot—enough moisture removal without wasting energy. This careful setup maximizes the system’s effectiveness and longevity, helping you avoid common pitfalls like false triggers or unnecessary fan runs.

VIVOHOME 240 CFM Bathroom Exhaust Fan with Humidity Sensor – 1.6 Sones Quiet Energy-Saving EC Motor, 6-Speed AutoFlow Remote, 11 x 12 in Easy Retrofit, 6-Inch Duct Kit Included
- High airflow capacity: 240 CFM for large bathrooms
- Ultra-quiet operation: 0.1 Sone brushless motor
- Rust-resistant construction: Durable metal shell
As an affiliate, we earn on qualifying purchases.
As an affiliate, we earn on qualifying purchases.
Modern Tech: How Smart Features Make Your Life Easier
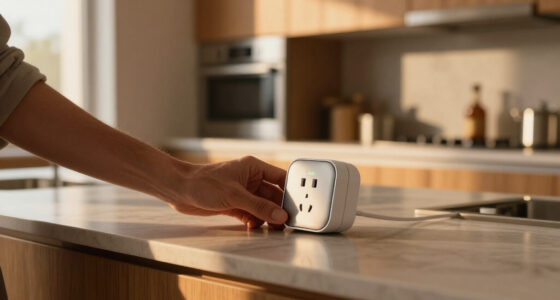
Today’s systems can connect to your Wi-Fi, letting you control and monitor your bathroom humidity from anywhere. Imagine getting a notification if humidity stays high longer than usual or adjusting settings with a tap on your phone. Voice commands through Alexa or Google Assistant add another layer of convenience.
Wireless sensors eliminate the hassle of running wires through walls, and AI-powered systems learn your habits. If you often take quick showers, the system adapts, turning on faster and turning off sooner. Some models even track energy use, helping you fine-tune your savings.
This integration not only simplifies control but also enhances efficiency. For example, a system that learns your shower habits can automatically adjust its response, reducing unnecessary fan runs and saving energy over time. Additionally, remote monitoring can alert you to potential issues before they become costly repairs, extending the lifespan of your system and maintaining optimal performance.
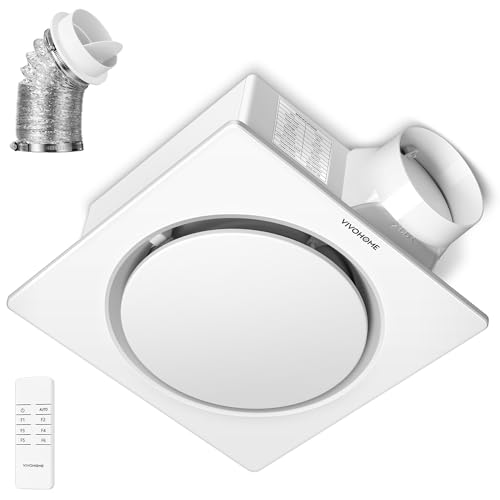
VIVOHOME EC Motor Bathroom Exhaust Fan with Humidity Sensor (160-110-50CFM
- Energy-efficient brushless motor: 110 CFM at 12.5W, saves energy
- Long-lasting durability: 30,000-hour lifespan, tool-free installation
- Auto humidity sensing: Automatically adjusts speed based on humidity
As an affiliate, we earn on qualifying purchases.
As an affiliate, we earn on qualifying purchases.
Common Pitfalls to Avoid When Automating Bathroom Fans
Failing to place sensors correctly is a top mistake. Keep humidity sensors away from direct water spray or drafts, or they’ll give false readings. This can cause your system to run excessively or not enough, wasting energy or risking mold growth. Proper placement ensures the sensor detects true ambient humidity, making your system more reliable.
Incorrect sensor placement can lead to frequent false triggers or missed detections, which not only wastes energy but also diminishes the system’s effectiveness in preventing mold. For instance, placing a sensor near a vent or in a drafty spot might cause it to register low humidity when the room is actually humid, leading to unnecessary fan operation or, conversely, missing high humidity that could promote mold growth.
Also, don’t forget to check wiring compatibility—using incompatible parts can cause failures or safety hazards. Investing in quality components and following manufacturer instructions reduces these risks and prolongs system life.
Another trap: setting thresholds too low or too high. Too low, and the fan runs unnecessarily, increasing energy use; too high, mold can grow before it triggers. Testing and adjusting your system ensures it performs just right, balancing comfort and safety. Regular calibration and observation help you fine-tune the system, avoiding these common mistakes. For example, setting the humidity threshold at 60% might delay activation, risking mold, while setting it at 30% might cause the fan to run constantly, wasting energy. Regularly reviewing and adjusting these settings based on actual conditions ensures optimal performance.
Finally, always hire a licensed electrician for wiring or smart system integration—cutting corners risks safety and code compliance. Proper professional installation guarantees your system operates safely and effectively long-term, preventing costly repairs or safety hazards.
The Best Sensors and Timers for Reliable Humidity Control
Choosing quality sensors and timers makes all the difference. Look for humidity sensors with a quick response time—ideally under 5 seconds—to catch rapid changes and prevent mold before it starts. Brands with good reviews often have better calibration and durability, which means fewer false triggers and more consistent performance, essential for maintaining a healthy environment.
Timers should be adjustable, with settings from 5 to 30 minutes, so you can customize based on your bathroom’s size and usage. Combining a sensor with a timer creates a smart duo—sensor detects humidity, timer controls how long the fan runs after detection. This pairing ensures the fan runs only as long as necessary, maximizing energy savings while preventing excess moisture buildup.
Investing in high-quality sensors and timers means fewer maintenance issues and more reliable operation, which is critical for long-term effectiveness and safety. Proper calibration and regular checks keep your system functioning optimally, helping you avoid unnecessary energy waste and mold risks.
Energy Savings and Safety Tips for Automated Fans
Automated fans can cut your energy bills by running only when needed—saving up to 50% compared to manual operation. To maximize savings, set your thresholds carefully and ensure sensors are correctly positioned to avoid false readings. Proper placement means the system responds accurately to real humidity changes, preventing unnecessary fan runs and energy waste.
Safety-wise, always turn off power before wiring and use surge protection to prevent damage during power surges. Regularly check sensor calibration and clean dust or debris that might interfere with readings. Proper installation and ongoing maintenance are vital for system safety and efficiency, reducing risks of electrical hazards and ensuring the system operates as intended over time.
Frequently Asked Questions
How do I pick the best humidity sensor for my bathroom?
Look for sensors with a quick response time (under 5 seconds), reliable calibration, and good reviews. Place it in a location away from direct water spray or drafts for accurate readings.Can I install a smart bathroom fan myself?
Basic timer or humidity sensor systems are often DIY-friendly, but smart systems with Wi-Fi and wiring to your electrical system may require a licensed electrician for safe, compliant installation.What’s the ideal humidity level to prevent mold?
Keeping humidity between 30-50% is recommended. Staying in this range helps prevent mold growth while maintaining comfort in your bathroom.Are smart fans worth the extra cost?
For many, the convenience, remote control, AI learning, and energy tracking make smart fans a worthwhile investment that pays off over time through savings and ease of use.How long should the fan run after a shower?
Typically, 15-30 minutes is enough to dry out moisture, but automation can adjust this based on humidity levels, ensuring efficient operation without wasting energy.Conclusion
Automating your bathroom fan isn’t just about convenience—it’s a smart move for a healthier home and lower energy bills. With a little setup, you can enjoy a consistently dry, mold-free bathroom while saving money and effort. Think of it as giving your home a quiet, invisible assistant that cares for your air—24/7.
Start small, pick the right system, and watch your bathroom stay fresh and safe without the hassle. Your future self will thank you for the cleaner air and smarter home.