TL;DR

Get home appliances delivered free with Prime
- Fast, free delivery on millions of items
- Prime Video, Amazon Music and more included
- Member-only deals all year
A drip system on a timer delivers water directly to plant roots, saving water and reducing maintenance. Proper setup involves choosing components, designing the layout, and programming the timer for your garden’s needs.
Use a filter and pressure regulator to prevent clogging and ensure even water flow.
Plan your emitter placement carefully for uniform watering across raised beds.
Choose a timer with adjustable settings and consider smart features for convenience.
Regularly inspect and flush your system to maintain optimal performance.
Latest tech like soil sensors and rain detectors can greatly reduce water waste.
Setting Up a Drip System for Raised Beds on a Timer
Deliver water where plants actually need it: directly to their roots. A thoughtfully planned drip system replaces hose-dragging and guesswork with consistent moisture, lower water use, and a garden that thrives with less daily attention.
The seven-part water network
Reliable irrigation starts with compatible components. Size the tubing for the number of beds, regulate pressure, filter debris, and give every run a secure connection and flushable endpoint.
Mainline tubing
Use ½-inch polyethylene for multi-bed runs; ¼-inch tubing works best for short branches and individual emitters.
Emitter line
Dripline or tape carries water along planting rows. Match its spacing to crops and bed geometry.
Emitters
Choose 0.5, 1, or 2 GPH drippers according to plant size, soil texture, and watering duration.
Timer
Look for adjustable duration, flexible watering days, multiple start times, and rain-delay controls.
Filter + regulator
The filter catches debris; the regulator provides steady, drip-safe pressure and more even output.
Connectors + caps
Tees, elbows, valves, stakes, end caps, and repair couplers keep the layout secure and adaptable.
From faucet to root zone
Build the head assembly first, then route the mainline to each bed. Confirm local backflow requirements and follow the installation order specified by your timer and filter manufacturers.
Sketch each bed, mark planting rows, and identify separate watering zones. Plants with very different moisture needs should use different lines, valves, or timer programs whenever possible.
Design out dry patches
For a typical 4 × 8-foot bed, run parallel emitter lines along the bed’s length. Place water outlets near root zones rather than simply dividing the bed into equal-looking spaces.
Example 4 × 8-foot bed
Four parallel lines with outlets spaced approximately 6–12 inches apart.
Give the timer a smart starting point
There is no universal schedule. Begin with a measured test cycle, check moisture several inches below the surface, then adjust frequency and duration for soil, crop maturity, season, and weather.
Starter program
Use this as a commissioning baseline, then verify moisture by hand. Deep, less-frequent watering may outperform shallow daily cycles in moisture-retentive soil.
Choose the control level you need
A basic timer is enough for one predictable bed. Multiple zones, travel, variable weather, or water-sensitive crops make sensor-ready and connected controls more valuable.
| Feature | Basic timer | Smart timer | Sensor-ready system |
|---|---|---|---|
| Automatic schedules | ✓ Yes | ✓ Yes | ✓ Yes |
| Remote phone control | ✗ No | ✓ Yes | ✓ Usually |
| Weather-based adjustment | ✗ Manual | ✓ Available | ✓ Available |
| Soil-moisture response | ✗ No | ~ Model dependent | ✓ Core strength |
| Best fit | Simple, single-zone beds | Convenience and travel | Maximum water precision |
How much flow do vegetables need?
Most vegetables can start with 0.5–1 GPH emitters. Larger plants and sandy soil may need greater flow or additional outlets.
How often should raised beds run?
Often daily or every other day, but weather, soil, mulch, crop size, and emitter output should determine the final schedule.
What stops frequent clogs?
Use a quality filter, flush lines periodically, replace dirty filter elements, and select clog-resistant emitters.
Should drip lines be mulched?
Yes. Mulch reduces evaporation, moderates soil temperature, and protects tubing from direct sunlight while keeping outlets accessible.
Ten minutes of inspection prevents dry beds
Walk the system while it is running. Look for silent emitters, unexpected puddles, loose fittings, mineral buildup, and tubing stressed by sunlight or soil movement.
Inspect emitters
Compare output across the bed and clean or replace weak, blocked, or damaged outlets.
Flush the lines
Open end caps and run clean water until sediment and trapped debris have cleared.
Service the filter
Rinse reusable screens and replace worn filter elements before flow becomes restricted.
Reset the timer
Shorten cool-season schedules, respond to rain, and increase watering carefully during peak heat.
What You Need to Build a Reliable Drip System for Raised Beds
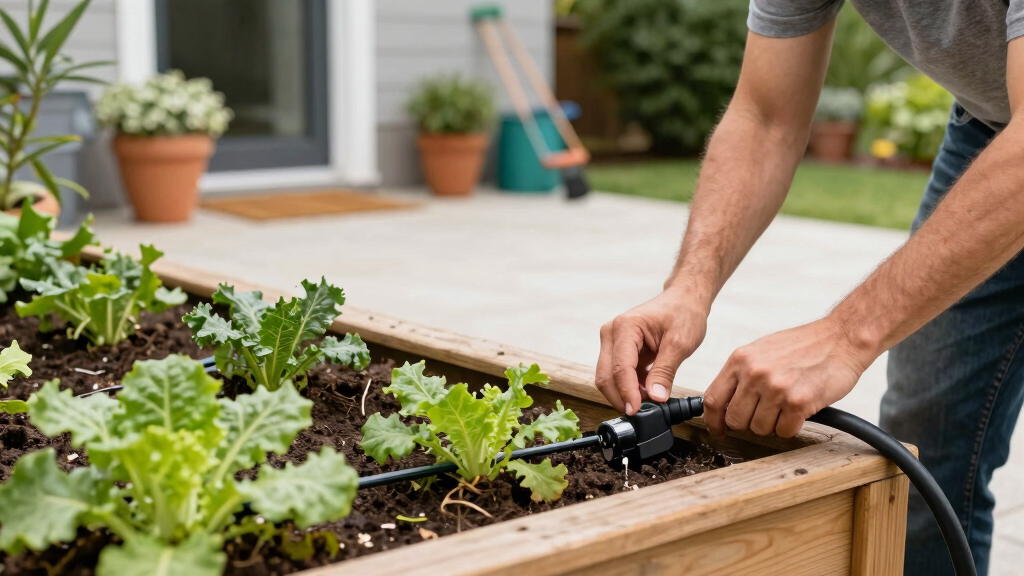
Creating a drip setup starts with understanding the core components. Think of it as assembling a miniature water delivery network tailored to your garden. You’ll need mainline tubing, emitter lines or drip tapes, emitters, a timer, a filter, a pressure regulator, and connectors. For instance, a typical raised bed of 4×8 feet may need a ½-inch mainline, with ¼-inch emitter lines running along the bed’s length, spaced every 12 inches to reach each plant.
Properly sizing your components prevents headaches later—like clogged emitters or uneven watering. A good rule: use a filter before the timer to keep debris out, and a pressure regulator to ensure water flows evenly. These small details make all the difference, especially during hot summer months when plants gulp more water.
drip irrigation system for raised beds
As an affiliate, we earn on qualifying purchases.
As an affiliate, we earn on qualifying purchases.
Designing Your Drip Layout Without Guesswork
Designing a drip layout is like setting the stage for a water-efficient performance. Measure your raised beds carefully—say, a 4×8 foot bed needs evenly spaced emitters to avoid dry patches or soggy spots. Position emitters about 6-12 inches apart, focusing on root zones.
Sketch it out first—visualize where each emitter goes, especially if you’re planting different vegetables with varying water needs. Use a pressure regulator to keep flow steady, and place a filter before the timer to catch dirt or debris that can clog emitters. This planning step ensures each plant gets just enough water, no waste or stress.
Why does this matter? Proper emitter placement prevents dry patches or overwatering, which can lead to root rot or water wastage. It also helps your system last longer, as uneven pressure or clogging can cause parts to fail prematurely. Thoughtful design minimizes the need for troubleshooting and ensures your garden thrives efficiently.
As an affiliate, we earn on qualifying purchases.
Step-by-Step: Installing Your Drip System Like a Pro
- Measure your beds and plan your layout.
- Lay out the mainline tubing along the length of each bed.
- Attach emitter lines or drip tapes at planned intervals.
- Connect everything securely using connectors and end caps.
- Install a filter and pressure regulator at the water source.
- Attach the system to your timer, setting it to water early morning or late evening.
- Test the system, look for leaks, and adjust emitter placement as needed.
For example, during your first setup, you might find a few emitters aren’t delivering enough water. Simply reposition them or add a second emitter for those plants. This step-by-step approach takes around an hour and ensures your system runs smoothly. Investing time here pays off by preventing issues down the line—clogs, leaks, or uneven watering—saving you frustration and rework later.
As an affiliate, we earn on qualifying purchases.
Choosing the Right Timer and Programming It Perfectly
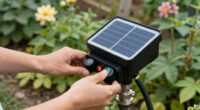
Timers are the brains behind your watering routine. A good drip timer automates everything, so you don’t have to remember. Look for one with adjustable run times, multiple start times per day, and compatibility with smart features.
Set your timer based on your plants’ needs. Most vegetables prefer about 15-20 minutes of watering, once a day. For a summer heatwave, you might increase this to twice daily. Use a calendar feature to match your local climate—watering deeply every 2-3 days often beats daily shallow watering.
Why is this important? Proper timer programming ensures your plants receive consistent moisture without overwatering, which can lead to root rot or fungal diseases. It also conserves water by avoiding unnecessary runoff or evaporation. Adjusting the schedule seasonally and based on weather forecasts can significantly improve plant health and resource use. Modern smart timers with remote control and weather integration make this process even easier, allowing you to fine-tune watering from anywhere.
As an affiliate, we earn on qualifying purchases.
Keeping Your Drip System Running Smoothly with Easy Maintenance
Regular checkups keep your drip system humming. Clogged emitters are common, especially if your water has minerals or debris. Every few weeks, inspect emitters, flush the lines, and replace filters if needed.
Imagine a hot Saturday, and you notice some plants aren’t getting enough water. A quick check reveals a clogged emitter. Flushing the line with water and replacing the filter fixes the problem fast.
Why is maintenance crucial? Regularly cleaning and inspecting your system prevents buildup of mineral deposits, algae, or debris that can clog emitters and reduce flow. Over time, small cracks or leaks may develop, especially if the tubing is exposed to sunlight or soil movement. Addressing these issues promptly extends the lifespan of your system—often 5-10 years or more—and ensures your plants always get the right amount of water, preventing stress or disease caused by inconsistent watering.
Latest Tech Trends Making Drip Systems Smarter and Greener
Smart irrigation controllers are changing the game. Connect your drip system to Wi-Fi, and you can control watering from your phone. Many models sync with weather apps or soil moisture sensors, turning watering on only when needed.
For example, a recent trend involves rain sensors that automatically pause watering during rainstorms, saving gallons of water. Eco-friendly materials like recycled tubing and self-cleaning emitters also help reduce environmental impact.
Modular kits, designed for easy expansion, let you grow your system as your garden expands. These innovations make drip irrigation more reliable, sustainable, and user-friendly than ever before. Embracing these technologies not only optimizes water use but also simplifies garden management, making it accessible and eco-conscious.
Frequently Asked Questions
How do I determine the right flow rate for my plants?
Most vegetables thrive with emitters delivering 0.5 to 1 GPH. Consider plant size and soil type—larger plants or sandy soil may need higher flow, while delicate seedlings prefer a gentle drip.How often should I water my raised beds?
Typically once a day or every other day, depending on weather and soil. During hot, dry spells, you might water twice daily or increase duration to keep roots moist.Can I connect my drip system to a smart timer?
Absolutely. Many modern timers are Wi-Fi compatible, allowing remote control, scheduling, and even integration with weather data for optimal watering efficiency.What if my emitters clog frequently?
Use high-quality filters, flush the system regularly, and choose clog-resistant emitters. Regular maintenance prevents blockages and keeps water flowing smoothly.Is it necessary to mulch over drip lines?
Yes. Mulching helps retain soil moisture, reduces evaporation, and shields emitters from sunlight, extending their lifespan and improving watering efficiency.Conclusion
A drip system on a timer is your secret weapon for a lush, low-maintenance garden. When you set it up properly, you give your plants exactly what they need—without the daily guesswork. Think of it as watering smarter, not harder—your garden will thank you every season.NFL season / tailgating Picks
team gear
As an affiliate, we earn on qualifying purchases.