
TL;DR
Open a free Amazon Business account
Business pricing, bulk buying and tax-exempt orders.
Create a free accountAs an affiliate, we earn on qualifying purchases.
Outlet timers automate battery charging, preventing overcharging and extending battery lifespan. Modern timers, especially digital and smart models, offer precise control and safety features. Using timers correctly is a cost-effective way to protect your batteries and save energy.
Ever watched a battery charger sit plugged in all night, wondering if it’s doing more harm than good? The truth is, leaving batteries connected too long can wear them out fast — overcharging leads to overheating, leaks, or even dangerous failures. But what if you could automate the process, charging just enough without risking damage?
This is where outlet timers shine. They’re simple devices that turn power on and off on a schedule, giving you a hands-off way to keep your batteries safe and healthy. In this guide, you’ll learn how to set up timers, what features matter, and how recent tech makes this even smarter and safer. Let’s turn your battery maintenance into a no-fuss routine that saves money and extends lifespan.
Select a timer with a load capacity that matches your charger’s power draw.
Set the timer for the exact duration recommended by the battery manufacturer.
Digital timers offer more control and flexibility than mechanical models.
Timers are a simple way to extend battery lifespan by preventing overcharge damage.
Always pair timers with a proper charger with built-in safety features for best results.
Why Using Outlet Timers for Battery Charging Protects Your Batteries
Using outlet timers to control when your charger runs is a game-changer. It’s not just about convenience; it’s about preventing the sneaky damage that overcharging causes. Batteries can swell, leak, or lose capacity faster if left charging too long. A timer cuts off power at the right moment, stopping this cycle before harm occurs.
By precisely timing the charging process, you reduce the risk of overheating, which can compromise battery integrity and safety. Overcharging not only shortens the lifespan but can also lead to dangerous situations, especially with lithium-ion batteries that are sensitive to heat and voltage spikes. A timer helps you maintain optimal charging durations, balancing battery health and performance. This proactive approach minimizes the need for costly replacements and repairs, and reduces energy waste by preventing unnecessary power consumption.

BN-LINK Indoor Countdown Timer with Repeat Function, 3-Prong Outlet Timer
- Adjustable Countdown Timer: Up to 6 hours with repeat function
- User-Friendly Controls: Six preset buttons and override switch
- Versatile Appliance Use: Suitable for various household devices
As an affiliate, we earn on qualifying purchases.
As an affiliate, we earn on qualifying purchases.
How to Pick the Right Outlet Timer for Your Battery Charger
Choosing the right timer is key to safe, effective charging. Not all timers are created equal—some are mechanical dials, others digital with programmable features. Look for a timer with a load capacity that matches your charger’s power draw, typically listed in watts or amps.
For example, a 10-amp timer can handle most small chargers, but if you’re charging larger batteries or multiple devices, go for a higher capacity model. Digital timers are better if you want precise control over start and stop times, especially if your charging needs vary day-to-day. Additionally, consider timers with features like multiple on/off cycles, delay start, and remote control, which add flexibility and safety. Investing in a timer with surge protection can also shield your equipment from power spikes, further safeguarding your batteries and electronics.

BN-LINK Outdoor 7-Day Programmable Timer Outlet, 2 Outlets
- Programmable Scheduling: Up to 8 on/off programs for two outlets
- Easy Setup: Select individual or preset days, DST mode
- Weatherproof Design: Durable, waterproof cover for outdoor use
As an affiliate, we earn on qualifying purchases.
As an affiliate, we earn on qualifying purchases.
Step-by-Step: How to Set Up Your Outlet Timer for Safe Charging
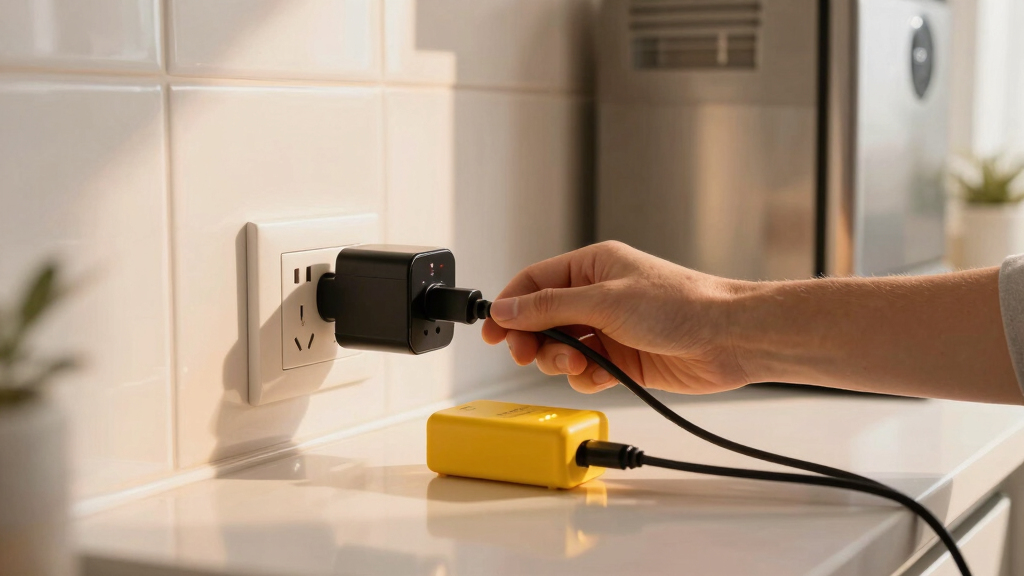
- Unplug your charger and plug it into the timer instead.
- Set the timer’s on/off schedule based on your battery’s recommended charging duration—usually 1 to 4 hours.
- Plug the timer into an outlet, then connect your charger to the timer’s outlet.
- Start the timer, and monitor the first few charges to ensure it switches off correctly.
For example, if your battery needs 3 hours, set the timer to turn off after that period. Over time, you’ll develop a sense of the optimal schedule for your specific batteries. Proper setup ensures the charger runs just long enough to reach full capacity without risking overcharge. Remember, consistent monitoring during initial uses helps identify any issues with timing or connections, preventing potential damage or safety hazards. Adjustments might be necessary based on battery size, type, and charging conditions, so pay attention to how your batteries respond over repeated cycles.
BN-LINK Outdoor 7-Day Programmable Timer Outlet, 2 Outlets
- Programmable Scheduling: Up to 8 on/off programs for two outlets
- Easy Setup: Select individual or preset days, DST mode
- Weatherproof Design: Durable, waterproof cover for outdoor use
As an affiliate, we earn on qualifying purchases.
As an affiliate, we earn on qualifying purchases.
The Pros and Cons of Mechanical vs. Digital Timers
| Feature | Mechanical Timer | Digital Timer |
|---|---|---|
| Ease of Use | Simple dial, no programming skills needed | Requires setup, but offers more control |
| Precision | Limited to set on/off times, less precise | Highly programmable with multiple cycles |
| Cost | Generally cheaper | Typically more expensive but worth it for accuracy |
| Features | Basic on/off | Includes delay start, multiple cycles, remote control |
Choosing between mechanical and digital timers involves understanding your specific needs. Mechanical timers are straightforward and reliable for simple on/off scheduling, making them suitable for basic applications or less frequent use. However, they lack flexibility and precision, which can be limiting if your charging routines vary or require multiple cycles per day.
Digital timers, on the other hand, provide advanced features like programmable schedules, multiple on/off cycles, remote management, and even integration with smart home systems. This flexibility allows you to fine-tune charging times based on your battery’s specific requirements, maximizing lifespan and safety. The tradeoff is higher cost and a slight learning curve, but the added control can significantly improve your charging routine’s safety and efficiency.

GHome Smart Plug, WiFi Smart Plugs Work with Alexa and Google Home, Smart Outlet Timer with APP Remote Control, 2.4GHz Wi-Fi Only, No Hub Required, ETL FCC Listed
- Stable WiFi Connection: Supports quick, stable 2.4GHz WiFi connection
- Voice Control Compatible: Works with Alexa and Google Assistant
- Remote App Control: Control outlets remotely via app anywhere
As an affiliate, we earn on qualifying purchases.
As an affiliate, we earn on qualifying purchases.
Recent Tech Boosts That Make Timers Safer and Smarter
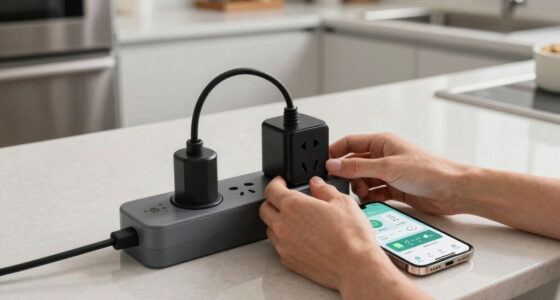
Today’s timers do more than just turn power on and off. Smart outlet timers connect via Wi-Fi or Bluetooth, letting you control charging schedules remotely through apps. They can adapt to your energy costs, turning chargers off during peak hours, and even monitor real-time status.
Some models include surge protection and overload alerts, reducing risk of damage. If you’re using solar or renewable energy, timers can sync with your system, charging batteries when electricity is cheapest or most abundant. These advances make safe, energy-efficient charging easier than ever.
What You Need to Know Before Setting Up Your Timer
Not every charger plays nice with timers. Check if your device has built-in smart features—if it does, using an external timer might conflict or be redundant. Always verify the timer’s load capacity; a mismatch can cause overheating or failure.
Make sure to follow safety steps: unplug devices when setting up, wear PPE if needed, and never overload outlets. Also, stick to manufacturer recommendations for charging times, not just guesswork.
The Limits: When a Timer Isn’t Enough
Timers alone don’t regulate voltage or current. They shut off power but can’t prevent overvoltage or current surges. For sensitive batteries, pairing timers with a good charger that has built-in protections is best.
For example, if you’re charging a lithium-ion battery, use a charger with temperature and voltage controls in addition to a timer. Relying solely on a timer is a good start, but not a foolproof safety net.
Quick List: Best Practices for Timer-Based Battery Charging
- Match timer capacity to your charger’s power draw.
- Set charging duration according to manufacturer specs.
- Use digital timers for precise, flexible schedules.
- Monitor first few charges to confirm timing accuracy.
- Always unplug and double-check connections before setup.
Frequently Asked Questions
Can I use a regular outlet timer with any battery charger?
Most chargers work fine with standard timers, provided the timer’s load capacity matches the charger’s power needs. However, avoid using timers with smart chargers that have built-in overcharge protections, as they might conflict. Always check your charger’s specs before pairing it with a timer.
How long should I set the timer for charging?
The ideal duration depends on your battery type and capacity. Follow the manufacturer’s recommended charging time, usually between 1 to 4 hours. For example, a standard drone battery might need around 2 hours, while larger power tool batteries could require up to 4 hours.
Are digital timers better than mechanical ones?
Yes. Digital timers offer precise control, multiple on/off cycles, and remote management, making them more adaptable to different charging needs. Mechanical timers are simpler and cheaper but lack programming flexibility.
Will using a timer completely prevent overcharging?
Timers help limit charging time but don’t regulate voltage or current. For complete safety, pair timers with chargers that include overcharge and temperature protections, especially for sensitive batteries like lithium-ion types.
What are the risks of not using a timer?
Without a timer, batteries risk overcharging, overheating, and capacity loss. Over time, this can lead to swelling, leaks, or even dangerous failures like fires. Using a timer adds a critical layer of protection and peace of mind.
Conclusion
Incorporating outlet timers into your battery maintenance routine turns a simple task into a smart, safe, money-saving practice. With the right timer and setup, you can keep batteries healthy without constant oversight or risk of damage.
Imagine a future where your batteries are always charged just right—no fuss, no worries. That’s the power of a well-chosen timer, working silently behind the scenes. Your batteries—and your wallet—will thank you for it.
Flea & tick season Picks
flea and tick prevention
As an affiliate, we earn on qualifying purchases.